


Article at a glanceQuick scan
- Bought my first cloud server just to keep a bot online 24/7
- Starting with student coupons, Ubuntu, and SSH key login
- Changing ports and configuring firewalls to set up basic security boundaries
Introduction
Initially, I didn’t plan on building a whole server system. I just wanted my QQ bot to be online 24/7.
Of course, I could run it locally. Keep AstrBot running, NapCat connected, services on, network stable, and use my computer as a host.

So, I naturally understood what a server is: a computer that runs 24 hours a day, housed in someone else’s data center.
And since the webmaster is a poor student, I naturally mobilized my AI army to help me find free options :)
Later, I saw that Alibaba Cloud had a 300 RMB coupon for student verification. Student benefits claim link. Might as well claim it.
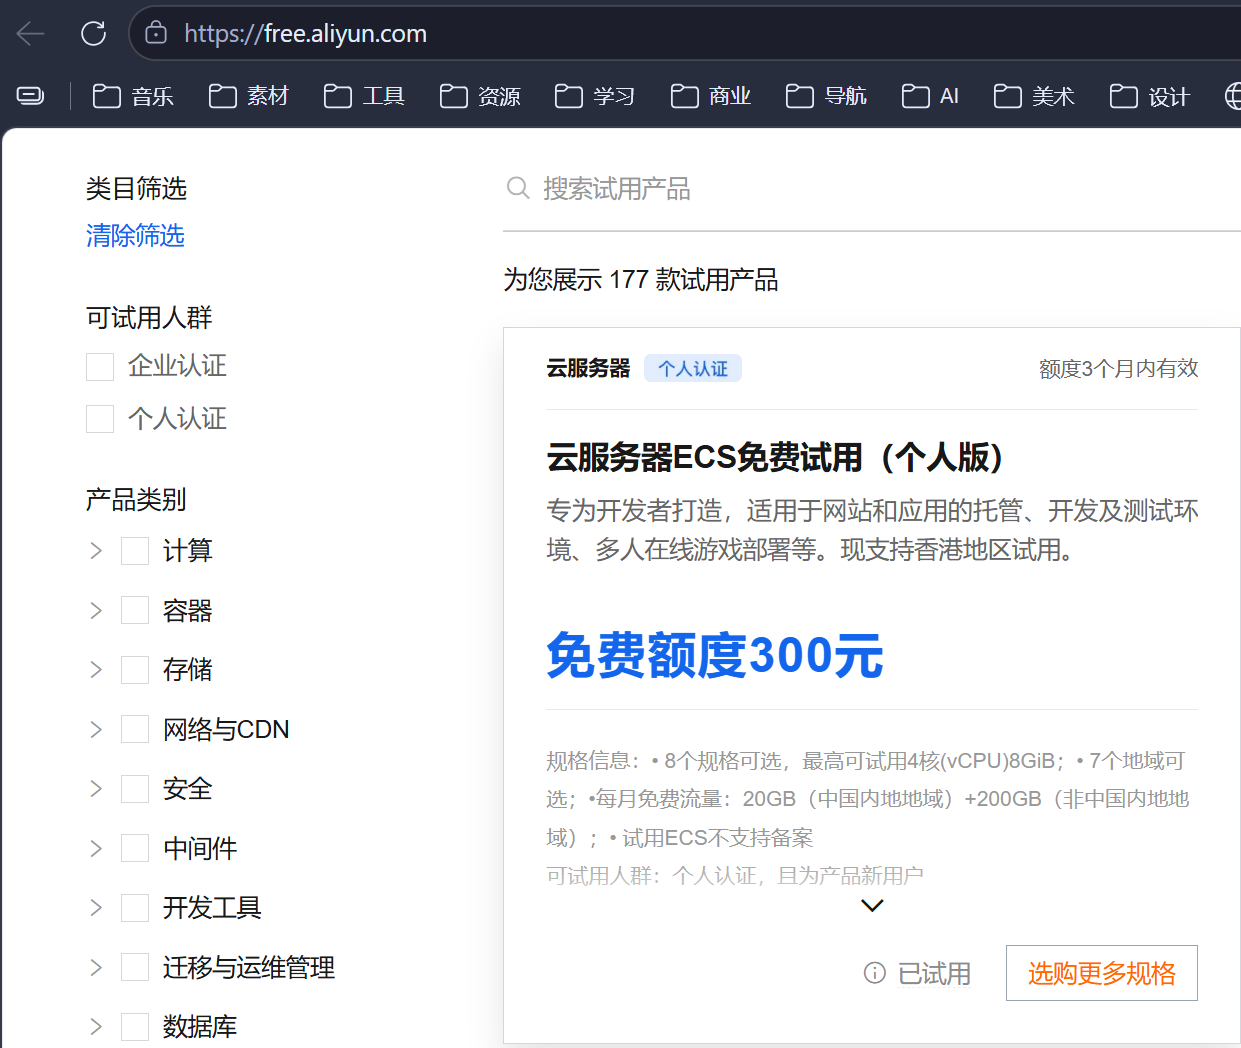
After claiming it, I also saw a trial ECS. I recommend trying this first; a 2H2G configuration is enough for running bots, and it lasts for three months.
Then, this 300 RMB coupon can be used to convert the trial ECS to a yearly ECS. The webmaster has already converted it!
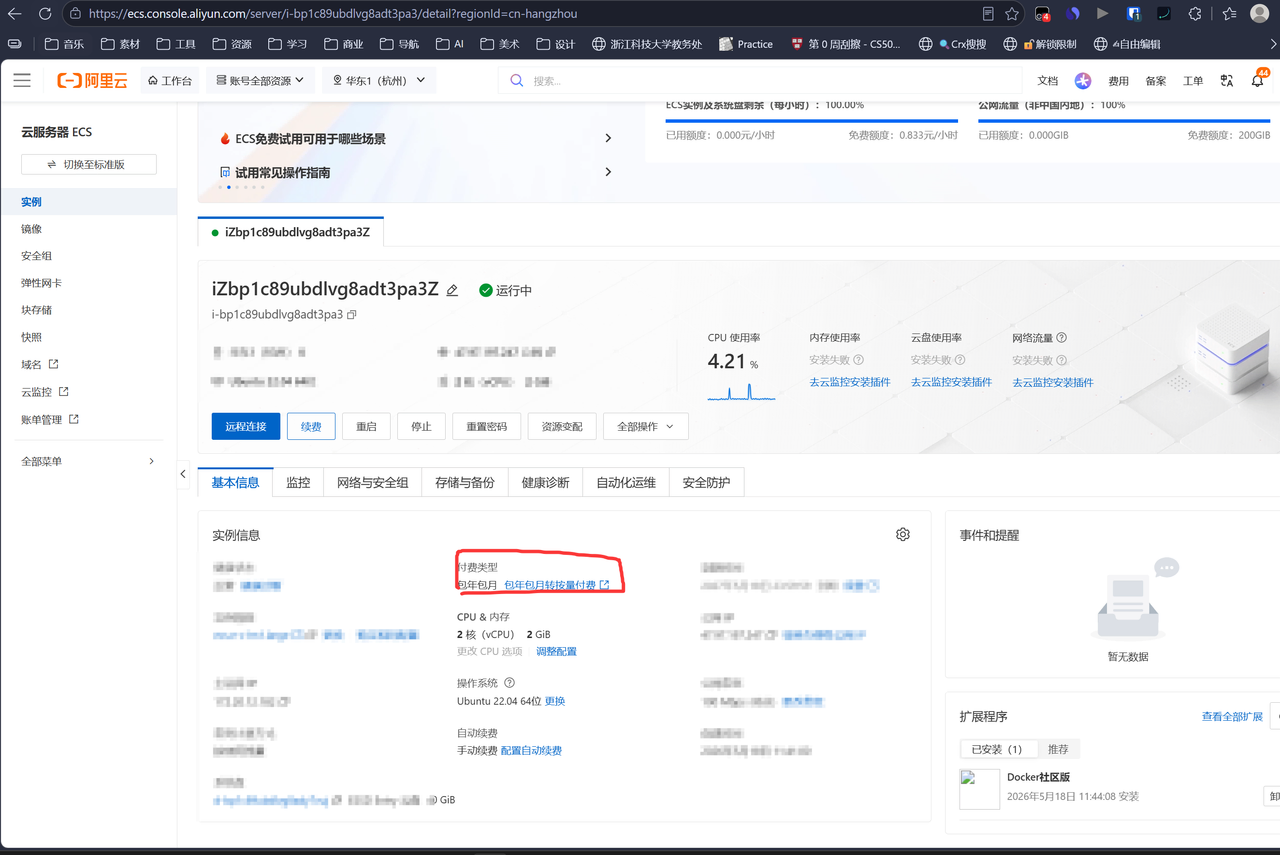
Calculated this way, you can essentially get a free server for four years.
However, be aware that Alibaba Cloud’s free monthly traffic for mainland China seems to be only 20GB. It’s enough for me just running bots, but it’s best to set up a quota alert.
First Connection to This Machine
After buying the server, the real problem began: how do I get in?
The console provides a public IP, root user, and initial password. The most direct way is to connect once with the password:
ssh root@<VPS_PUBLIC_IP>The first connection will ask if you want to trust this machine. Confirm the IP is correct, then type yes.
But this password login is only for temporary use. For long-term use, I still recommend switching directly to SSH key login.
Password login is like hiding a key under the doormat. It’s convenient, but public machines are scanned daily. Default port 22 plus password login is basically telling all the scripts on the internet, “Come knock on my door.”
Generating SSH Keys
I’m doing this on Windows, so I’ll first generate an SSH key specifically for this server locally:
ssh-keygen -t ed25519 -C "sayori-vps" -f "$env:USERPROFILE\.ssh\sayori_ed25519"You can just press Enter all the way through. If you want to add another layer of protection to your private key, set a passphrase.
Two files will be generated:
C:\Users\<Your_Username>\.ssh\sayori_ed25519C:\Users\<Your_Username>\.ssh\sayori_ed25519.pubThe one without .pub is the private key. If you don’t know what it’s for, you can send it to me, then I can connect to your SSH 😈
The one with .pub is the public key, which can be placed on the server.
Let’s look at the public key content:
Get-Content "$env:USERPROFILE\.ssh\sayori_ed25519.pub"Copy the entire line, from ssh-ed25519 to the end of the comment.
Putting the Public Key on the Server
Keep the password-logged-in SSH window open. On the server, prepare the SSH directory:
mkdir -p ~/.sshchmod 700 ~/.sshnano ~/.ssh/authorized_keysPaste the entire line from your local .pub file, then save.
Then change permissions:
chmod 600 ~/.ssh/authorized_keysThis step seems strange, but it’s very important. If the permissions are too loose, SSH will fail directly and won’t recognize this key.
Next, write an SSH alias locally. This way, you won’t have to type a long string of IP, port, and private key path every time.
Open:
notepad $env:USERPROFILE\.ssh\configWrite this in:
Host sayori HostName <VPS_PUBLIC_IP> User root Port 22 IdentityFile ~/.ssh/sayori_ed25519Open a new terminal to test:
ssh sayoriIf you can connect directly, it means key login is working.
Note: test in a new terminal. Don’t close the old password login window yet; it’s like a safety rope. Only let go after everything is changed.
Disable Password, Change to a Non-Standard Port
Once key login is stable, you can disable password login and move SSH from the default port 22.
First, choose a non-standard port, for example:
11451Don’t just copy mine directly. Pick a port between 1024 and 65535 that doesn’t conflict with other services.
Then, go to Alibaba Cloud ECS security group and allow this port. This is crucial.
The UFW inside the server is one door, and the Alibaba Cloud security group is another. If you only change the server and not the security group, the new port still won’t be accessible.
After allowing the port in the security group, go back to the SSH window and write your own SSH configuration snippet:
nano /etc/ssh/sshd_config.d/99-sayori.confContent:
Port <SSH_PORT>PubkeyAuthentication yesPasswordAuthentication noPermitRootLogin prohibit-passwordHere, PermitRootLogin prohibit-password means root can still log in with a key, but not with a password.
A more rigorous approach is to create a new regular user and then disable root. But for this post, I’m covering the fastest usable method.
After modifying, first check for syntax errors in the SSH configuration:
sshd -tNo output is good news.
Then restart the SSH service:
systemctl restart sshDo not close the old window yet.
Also change the port in your local ~/.ssh/config:
Host sayori HostName <VPS_PUBLIC_IP> User root Port <SSH_PORT> IdentityFile ~/.ssh/sayori_ed25519Now open a third new terminal to test:
ssh sayoriIf you can connect, it means the new port, key login, and security group are all working.
I would test one more time if the old password login is disabled, for example, by not using the private key and manually connecting to the IP.
If it still asks for a password and lets you in, it means PasswordAuthentication no didn’t take effect. Don’t rush to continue; figure that out first.
Configure Firewall
Once SSH is stable, configure the server’s own firewall.
On Ubuntu, UFW is the most convenient:
apt updateapt install -y ufwWrite the rules first:
ufw default deny incomingufw default allow outgoingufw allow <SSH_PORT>/tcpIf you’re already planning to run web services, you can allow HTTP / HTTPS for now:
ufw allow 80/tcpufw allow 443/tcpThen enable it:
ufw enableufw status verboseHere, I still recommend keeping the old SSH window open. Open a new terminal and connect again:
ssh sayoriIf you can connect, then close the old window.
After Connecting, Explore the Machine
Once truly connected and stable, you can take a look at the machine’s status:
uname -adf -hfree -hsystemctl status ssh --no-pagerufw status numbered2H2G isn’t a lot of memory, so future service choices will mostly need to be lightweight.
If you can avoid a database, do so. If SQLite works, use SQLite first. If it can be hosted on Cloudflare Pages, don’t put it on the VPS.
This machine later ran more than just bots; Vaultwarden, ntfy, Gatus, Portainer, and AI Search Gateway all grew from here.
https://awesome-selfhosted.net/, this is a great “awesome” series website about how to utilize servers!
Looking back, the most useful thing about a personal server isn’t a specific service, but rather being forced to understand networking, deployment, security, and backups.
If I were to do it again, I would establish a few habits earlier:
- Separate directory for each service
- Real secrets only in
.envor platform Secrets - Write all reproducible commands into documentation
- Leave a verification command after each deployment
That’s all for this post. The server can now be stably connected via SSH, password login is off, the port has been changed, and the firewall has its basic boundaries.
The next post will cover how to use scp to move local configurations to the remote host.
Which means, finally, moving the bot from “it runs on my computer” to “it runs on the server too.”
Some information may be outdated